Run First Aid on an external drive on Mac
Published
Use First Aid in Disk Utility to check a stable external drive for file-system errors. Before running a repair, copy important files if the drive still opens. If the device keeps disconnecting, makes unusual mechanical noises or holds your only copy, prioritise getting the data off the drive before attempting repeated repairs.
Before opening Disk Utility
First Aid checks structures macOS uses to find files. It can help when a volume mounts inconsistently or Disk Utility reports a file-system error. For a drive that reads normally but rejects writes because it uses NTFS, follow the NTFS guide. First Aid won’t change the permissions or add NTFS write support.
Quit apps using the drive, including Photos if its library is there, and let any active copy finish. Connect the disk directly if its hub has been unreliable. Keep the backup on a separate device and open a few files from it before you start.
1. Confirm that macOS sees the drive
In Disk Utility, choose View → Show All Devices. Find the external device by its name and capacity. If it is absent, start with the Finder and Disk Utility checklist to check the connection. First Aid needs a device that macOS can see.
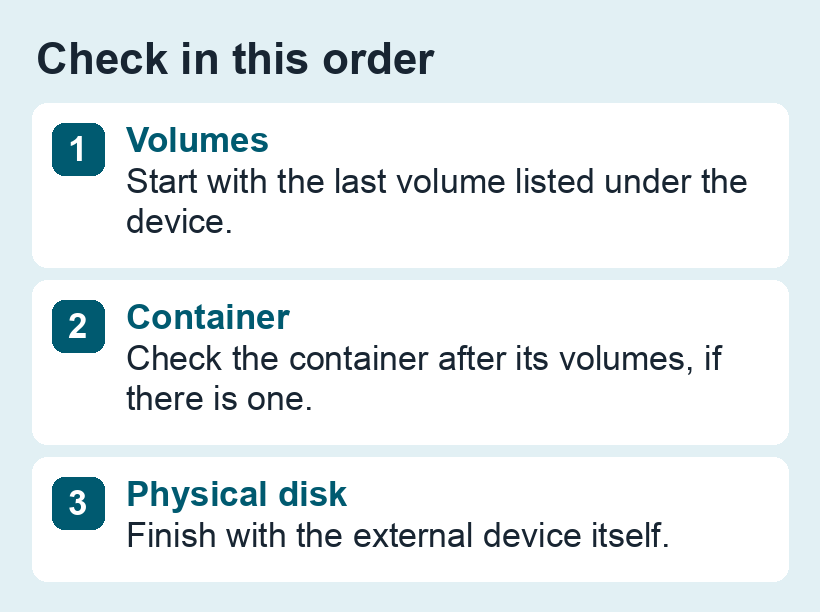
For example, imagine the sidebar shows Travel SSD → Container disk4 → Photos, Projects. Travel SSD is the physical drive, and Photos and Projects are volumes you might see separately in Finder. With that order, start with Projects, then run First Aid on Photos, the container, and finally the drive. The disk number in this example is illustrative. Use the names and capacity on your Mac.
2. Run First Aid from the bottom of the list up
- Select the lowest volume listed under the external device. Click First Aid, then Run. Read the result before moving on. If the volume is locked, use its password when macOS asks.
- Repeat for the volumes above it belonging to that device, then for the container if one is present, and finally for the physical disk.
- If First Aid is unavailable on an item, skip that item as Apple’s guide describes. Make sure the highlighted entry belongs to the external disk at every step.
3. Interpret the result
- The check completes: open the drive in Finder and read a few known files. If you can read files but writing still fails, check the format, permissions and free space.
- First Aid can’t repair a detected error: record the message. If you still need files from the drive, leave Erase alone and focus on getting a verified copy. Once you have the files, decide whether to replace the drive or erase and reformat it.
- The disk drops out during the check: investigate the connection when the files are safe. See the direct-versus-dock checklist.
What if First Aid says the volume is in use?
Close windows and apps working with files on that volume and wait for transfers or backups to stop. Retry once after the drive is idle. If the same error persists, copy anything you can still read and keep the error text. For a startup disk, Apple describes running Disk Utility from macOS Recovery. This walkthrough covers an external data disk.
After a successful check, eject the disk in Finder, reconnect it, then open files from more than one folder. If the same error returns or the drive disappears again, keep your separate copy and investigate the connection or device before using it for working files.
Source: Apple’s guide to repairing a storage device with Disk Utility.